I know, I know, I hear you already screaming… “Why the bloody hell do I need a load balancer if I only need https?!” I am sure there are ways to circumvent the ELB approach (see this and that). I will for sure take a look at those when my AWS free tier subscription expires. For now I will stick to the not-at-all-straightforward-but-pulling-future-hard-earned-euros-out-of-my-pocket-anyways method AWS wants me to.
Configure Elastic Beanstalk to use a Load Balancer
Basically, do what James Beswick says in his blog post Tutorial: Adding https to a custom domain on Elastic Beanstalk
However, since there has been a small change in the web sonsole in respect to the Elastic Beanstalk configuration, substitute step 3 with the following:
- Go to the AWS console
- Click on your application environment

- Go to Configuration and then “Modify” Load Balancer
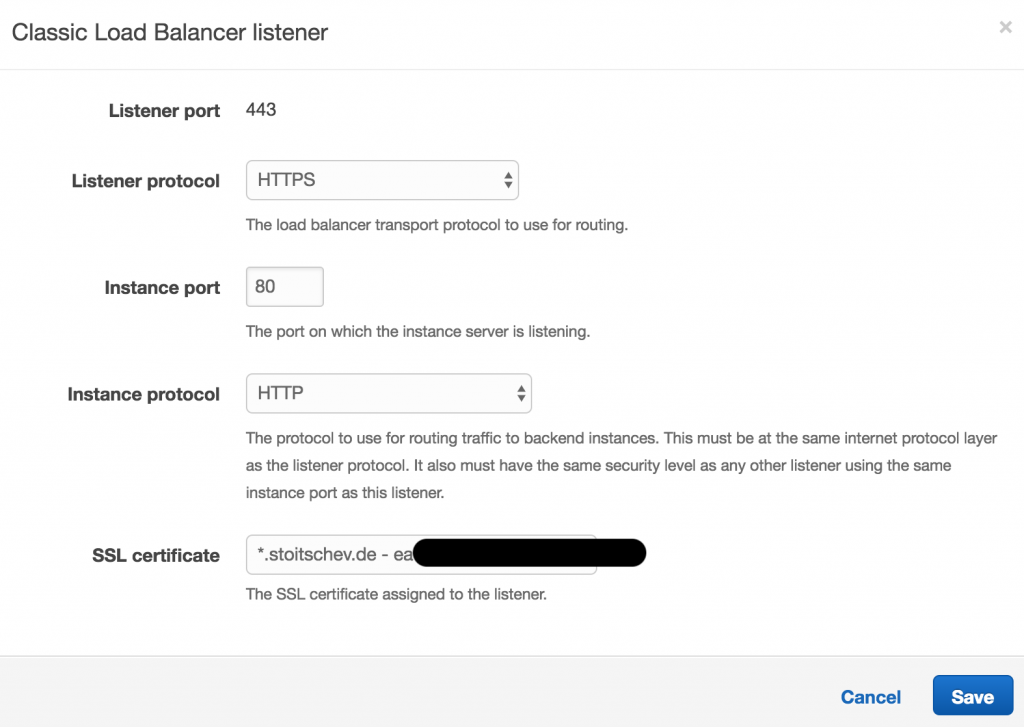
- Add a new listener for port 443:
- And add the certificate you created following J.Beswick’s tutorial.
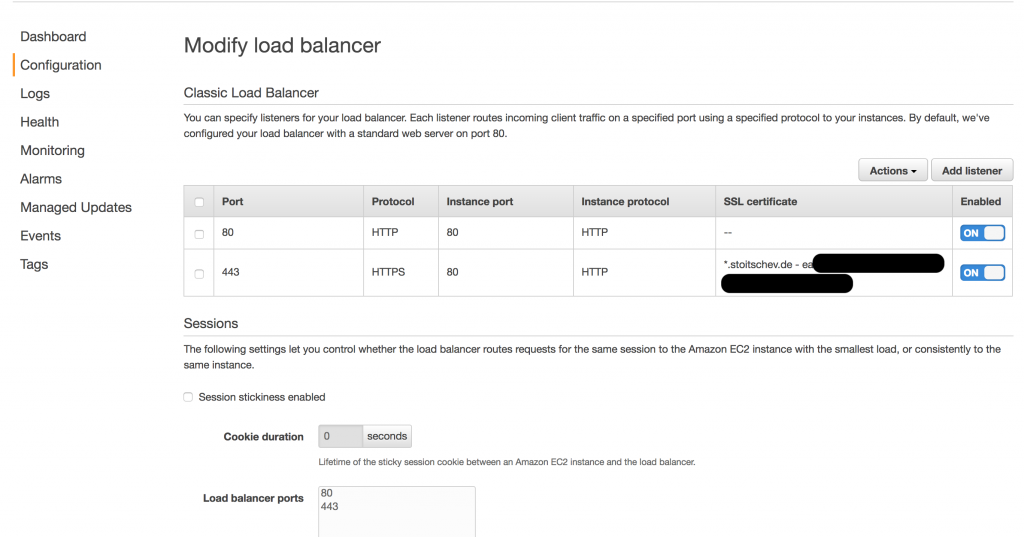
- So it should look like this now:
- Save


Configure the load balancer via the EC2 dashboard
This part turned out to be crucial for me, since I constantly got 408 HTTP errors trying to access https on AWS elastic beanstalk with load balancer
So I needed to do some more configuring:
- Go to the EC2 dashboard and click on Load Balancers
- Scroll down to Listeners and Edit.
- Now it is important that you change the Instance Port of the HTTPS Load Balancer Protocol to 80. Don’t worry. The requests directed to the load balancer are routed to the VPC, so no loss of encryption here. Btw, kudos go to Mark B for pointing out this last part in this SO


